|
|
|
Aviation Links:
|
Wingtip Installation: pg 1 | pg 2
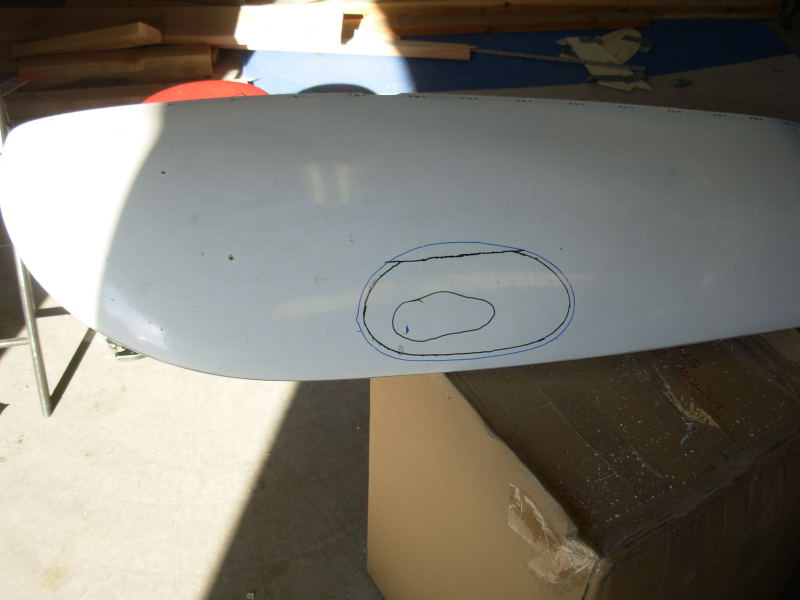
With the wingtips fit and nutplates installed, it was time to tackle the task of mounting the wingtip navigation and strobe lights. I cheated a little bit by buying the premolded nav lights extension fiberglass pieces from Van's. Being a fiberglass novice, the task was a little intimidating at first but turned out to be easier than I had feared and I am pretty happy with how they turned out. This page shows the big progress steps. First I marked the wingtips for the approximate position of the pre-molded extension piece, using the extension to look for best fit and location to meet FAA visibilty angle requirements. Here's my rough traces / marks prior to cutting the hole in this wingtip (the idea was to cut on the interior black line, then file at roughly a 45 degree angle back to the wider blue line; the extension mating surface was then filed at angle as well and epoxy applied to that mating surface for fit requiring least amount of filling afterwards):
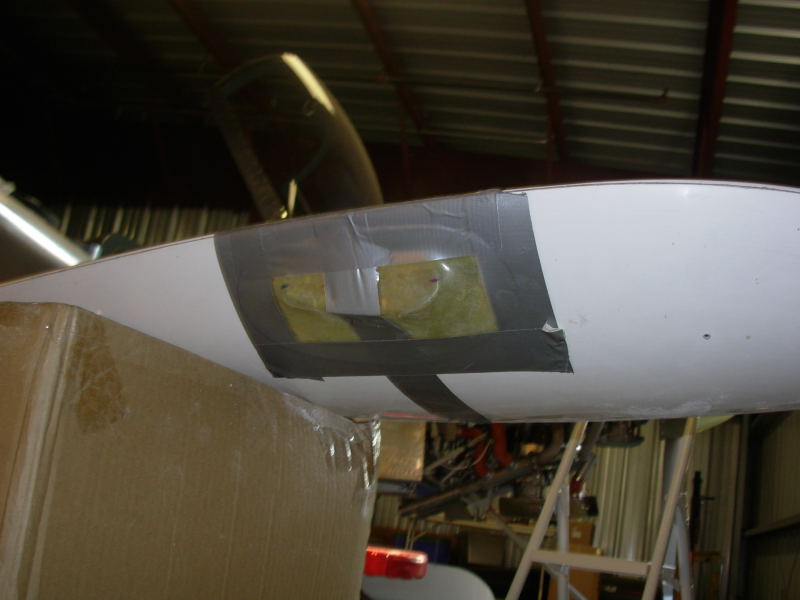
With the hole cut and the mating surface angles filed & fit as best I could, I applied epoxy to the mating surfaces and used duct tape to hold the fixture in place as tight as I could. What you can't see in this picture is the overlapping fiberglass reinforcement strips I applied on the inside (see picture further down for inside view where you can see some of that overlap that helps solidify the installation):
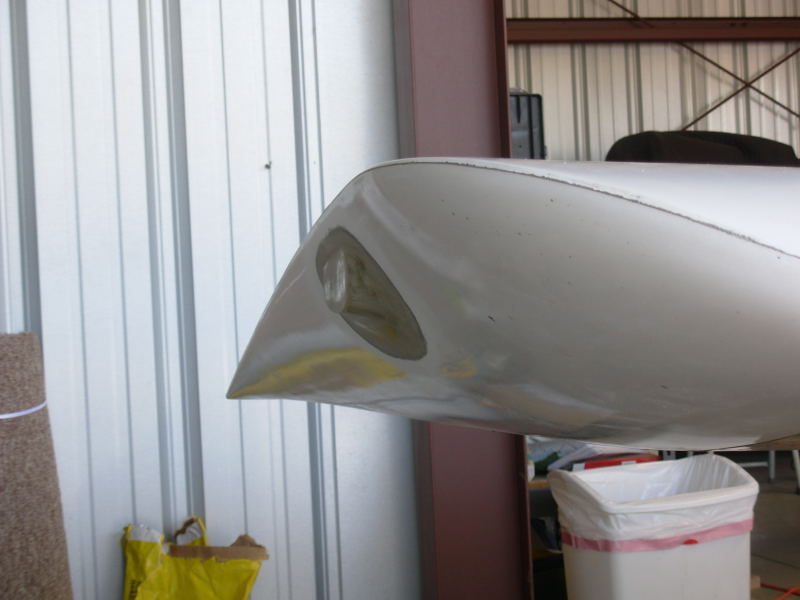
Here's the right side wingtip nav light mount prior to filling, sanding, pinhole filling, sanding, more sanding, etc:
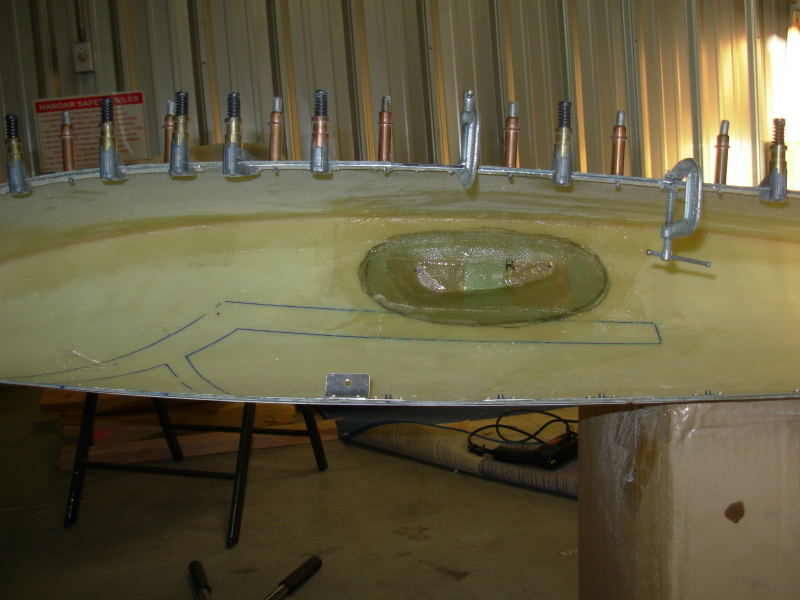
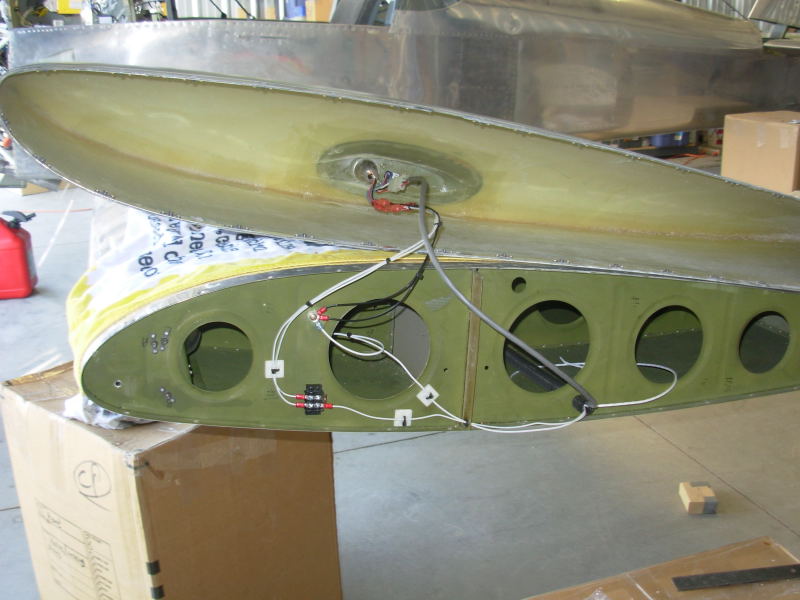
This shot shows the nav light mount support structure from the inside of the wingtip. You can see the overlapping fiberglass cloth that provides additional support from the inside. The blue trace is the outline for my Archer wingtip VOR/GS antenna installation:
And here's the left wingtip with the lights installed and wired up:
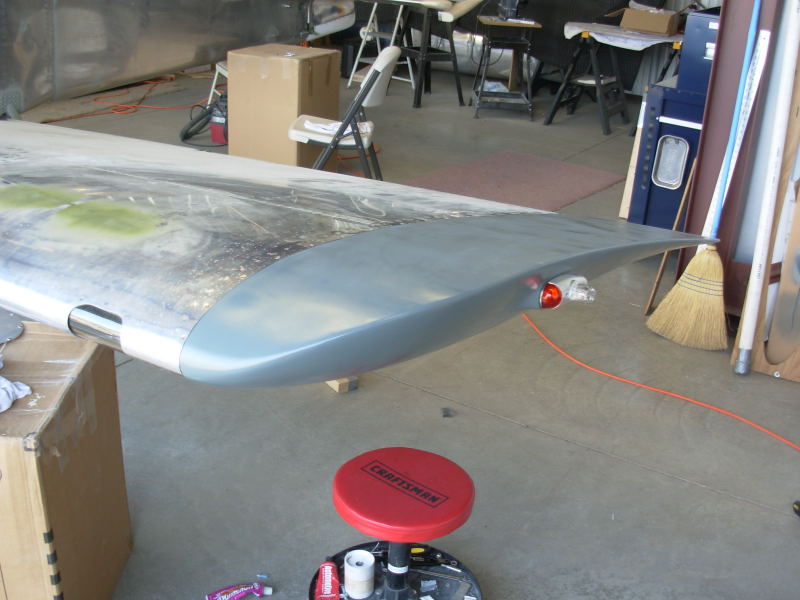
After filling the imperfections and pinholes, I primed the wingtips and reinstalled. Here's what the right side looked like for first flight:
And here's the left side from the front:
Front, side view of left wingtip, ready for first flight:
Wingtip Installation: pg 1 | pg 2
|
|
This page was last updated on 12/18/11.
Click here for questions or feedback. Copyright © 2007. All rights reserved. Chris Hand, chris@ckhand.com
|