|
|
|
Aviation Links:
|
Panel: pg 1 | pg 2 | pg 3 | pg 4 | pg 5 | pg 6| pg 7 Electrical: pg 1 | pg 2 | pg 3 | pg 4 | pg 5 | pg 6 | pg 7 | pg 8
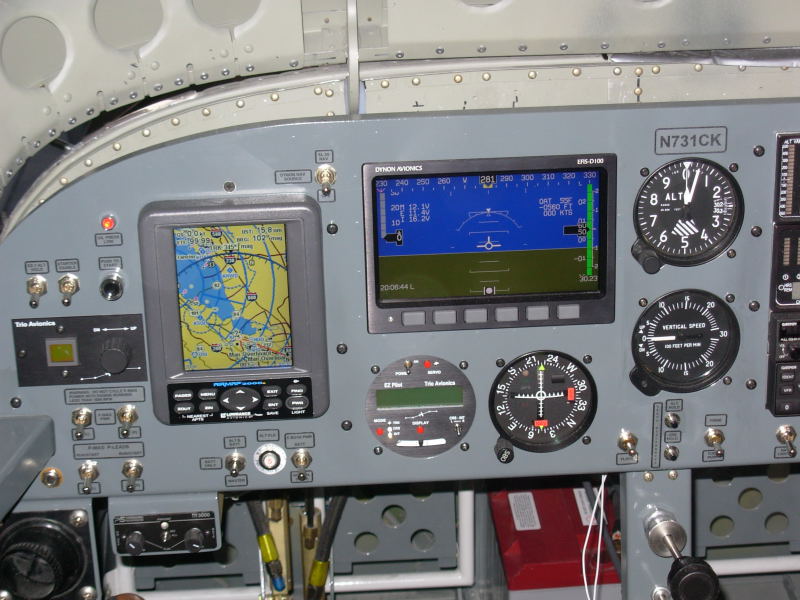
Here's the finished panel with labels installed, all powered up:
The Lowrance 2000C GPS feeds both the Trio EZ-Pilot wing leveler, single axis autopilot and the Dynon D-100 unit. The D-100 EFIS has a split screen mode, not shown here, that will use the GPS signal to show a DG type display next to EFIS display and gives other GPS derived data such as wind speed, cross-wind component, ground track, etc. The Dynon will also take data from the SL-30 NavCom to put a HSI display on the EFIS split screen. The switch to upper right of the 2000C GPS is a selector switch that switches between GPS and SL-30 data feeding the DG/HSI display on the Dynon. Left side view of powered up RV-6A panel:
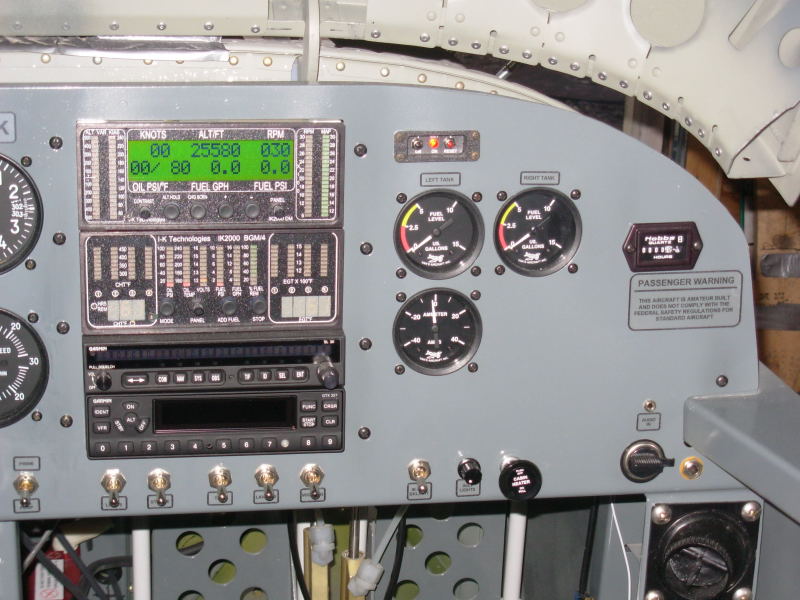
Close up of the avionics and IK-2000 engine monitor system is shown here. As you can see, the IK-2000 display includes airspeed and altitude indication along with the standard engine monitor data. The 25,580 foot altitude indication in this picture is an anomaly that shows up when pressure altitude is negative - actual altitude in this photo is about 30 or 40 feet MSL with a pressure altitude that day in the -100 to -200 foot range - it indicates fine when pressure altitude is zero or above so will be fine in flight and at airports that are not located at sea level:
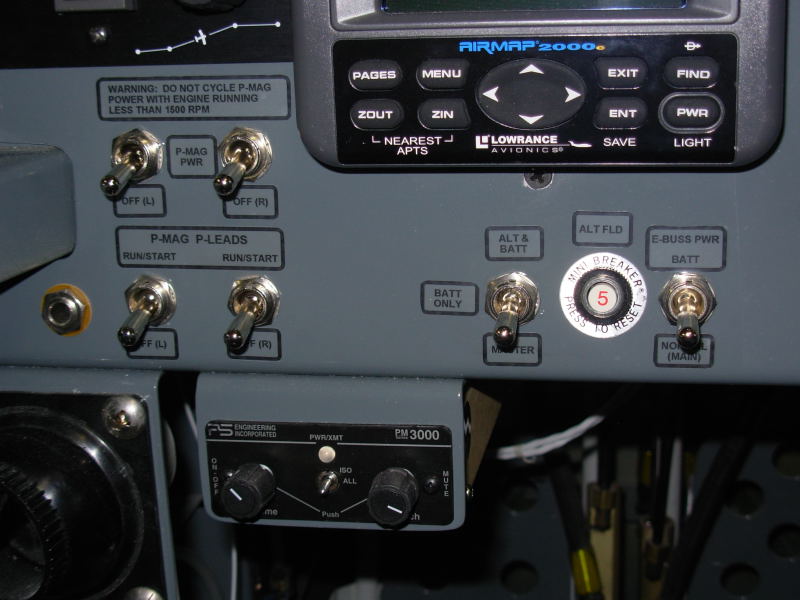
I used a P-Touch label maker to make all the labels on my panel. For less than $100, I got one that can print labels up to 2.4 inches in height and as long as you want to make them. I used the clear tape with black print and cut the labels out around the black border I put on them. Not as fancy as some methods I've seen, but looks pretty good and it's VERY easy to change or replace labels. Here's a close up shot of how the labels turned out, and you can also see here how I set up my P-Mag ignitions (used P-Mag electronic ignitions from E-MAG Ignitions instead of standard mags):
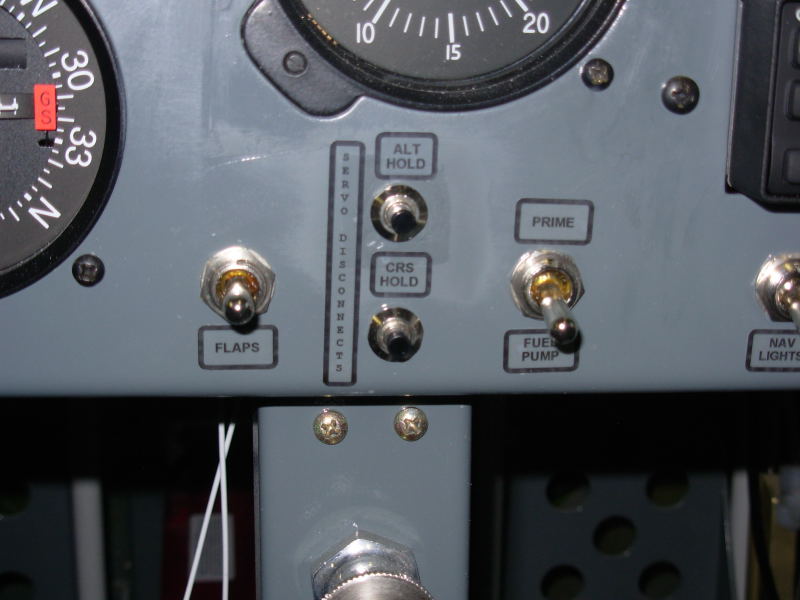
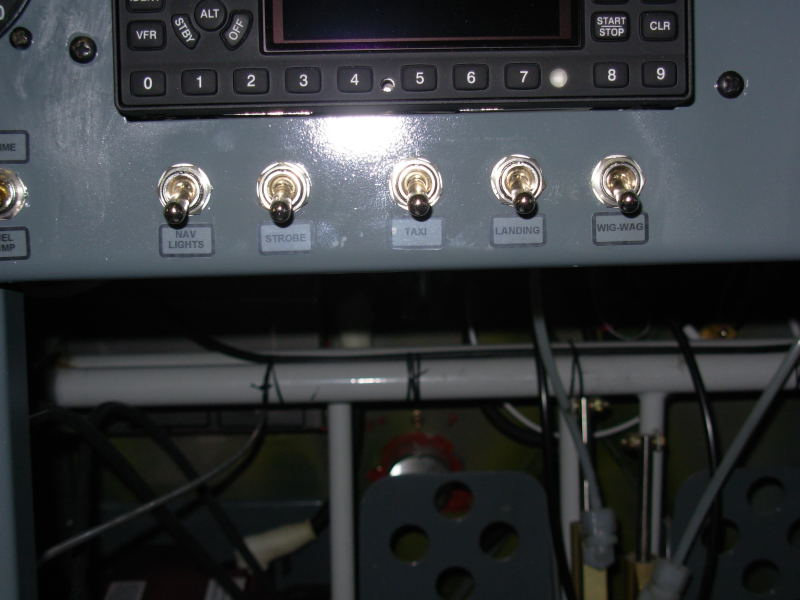
Light switches shown here, placed below the transponder:
Right side of finished, powered up panel:
Panel: pg 1 | pg 2 | pg 3 | pg 4 | pg 5 | pg 6| pg 7 Electrical: pg 1 | pg 2 | pg 3 | pg 4 | pg 5 | pg 6 | pg 7 | pg 8
|
|
This page was last updated on 12/18/11.
Click here for questions or feedback. Copyright © 2007. All rights reserved. Chris Hand, chris@ckhand.com
|